Some specialties, like dermatology, rely heavily on visuals for diagnosis. For this reason, when sending an eConsult, it’s important to provide high quality, well-lit and focused images.
Here are five tips to help you capture the best possible clinical photos for eConsult:
1. Lighting
 Images need to be bright enough to clearly depict the object of the photo, but not so bright they wash out your image or alter the colours. Whenever possible, take photos in natural, diffuse sunlight. Position the patient near a window, facing the sun, to avoid shadows.
If you’re unable to use natural light, try to find a light source as close to white as possible (fluorescent or full spectrum bulbs, rather than incandescent, are recommended). You can also turn on overhead lights, lamps or wear a headlamp while taking the photo.
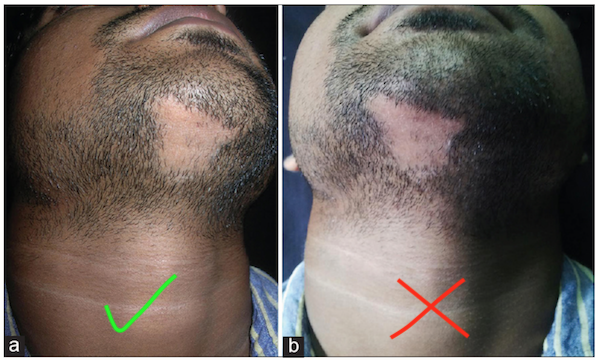
2. Background
Background colour can affect red-based hues in a photo, altering skin tone and the true colour or appearance of your image.
 To avoid this, use a solid, non-reflective blue or green surface that covers the entire frame of view as your background. Sterile towels, pillowcases and sheets work best. Blue incontinence pads can also be used.
Remember to remove distracting elements, like clothing, jewellery, paper towels, cotton swabs, gloves and hair, from the area to make the object you’re trying to capture stand out.
3. Flash
Flash can be a useful tool when capturing images in low light, however, the problems that accompany flash photography, such as glare, overexposure, colour shift and dark shadows, often outweigh the benefits.
If you do need to use flash, the best option is to use a digital SLR camera with an on-camera external flash (also called a speedlight) and a snap-on flash diffuser. If you don’t have a diffuser, you can create one yourself by fastening something translucent over the flash, such as white or clear tape, paper or tissue.
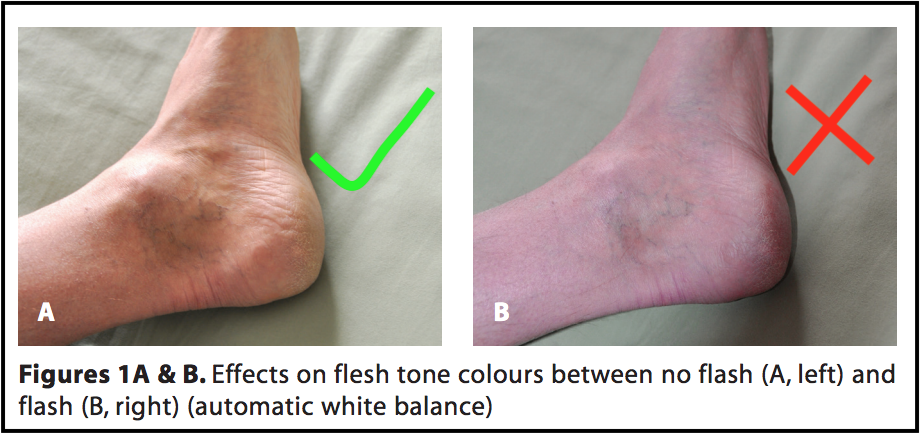
The makeshift diffuser trick will also work on digital cameras with a built-in flash. Anything you can do to redirect the concentrated source of light from the flash to diffuse and reach the object from many angles will result in softer shadows and less glare.
If you are using an iPhone, consider using the High Dynamic Range (HDR) setting.
4. Focus
Out of focus photos are one of the top reasons specialists have difficulty interpreting images. To ensure your pictures are sharp and clear, make sure the camera is focused on the foreground — and the object you want to capture — not the background of your photo.
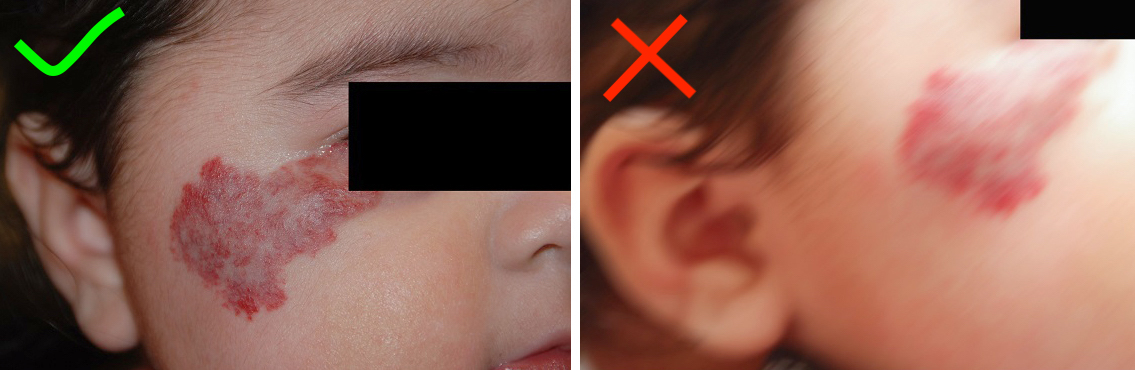
Use a small, portable tripod, or rest the camera on a hard surface (i.e. table, desk), to keep it still. You can also brace the camera against something solid, like a doorjamb or wall, to hold it steady, or brace your arms against your chest and squeeze the shutter after exhaling.
Be mindful of the camera’s distance from the object. Unless you’re using the camera’s macro setting, it’s preferable to move a few centimetres away before trying to capture an image.
5. View
Frame of reference and camera angle are key components to capturing a good view in clinical photos. Submitting three photos of the same object, taken from different frames of reference, is recommended in order to provide the most information.
The first image should show an obvious physical region and orient the viewer to the part of the body being examined. The second image should include surrounding skin, contralateral limbs and an anatomical landmark, such as a navel or finger. The third photo should be a close-up of the object.
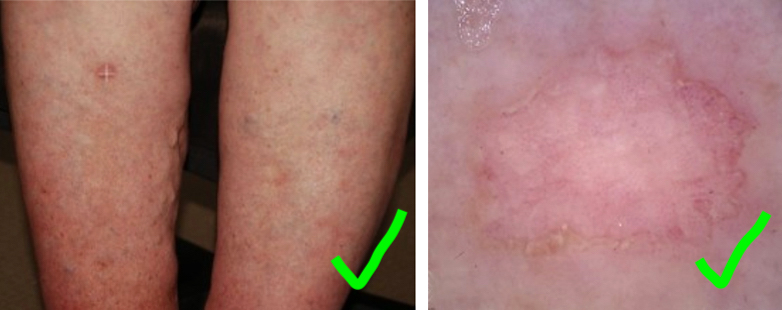
The first two images should be taken using the regular/auto camera setting, while the third should be taken using the macro setting. A ruler, or commonly identifiable object (i.e. pen, coin), should be placed next to the object to give the viewer an idea of size.
In regard to angle, the camera should face the object straight on and perpendicular. Taking images at an angle causes distortion and may not accurately show the size or shape of an object. If the object wraps around a rounded body part, several photos may be necessary to capture the entire object.
Finally, be mindful of capturing patient identifying information in photos (i.e. tattoos, jewellery, clothing logos). If possible, have the patient remove them, cover them, or avoid taking your photo in a manner where they are visible.
For more tips and tricks on taking photos for eConsult, visit the following resources: